How to Schedule a QR Code for an Event: Set a Start and End Time

Key Takeaway
Schedule an event QR code with QRLynx. Follow real screenshots to set start and end times, check the timezone and test registration access before printing.
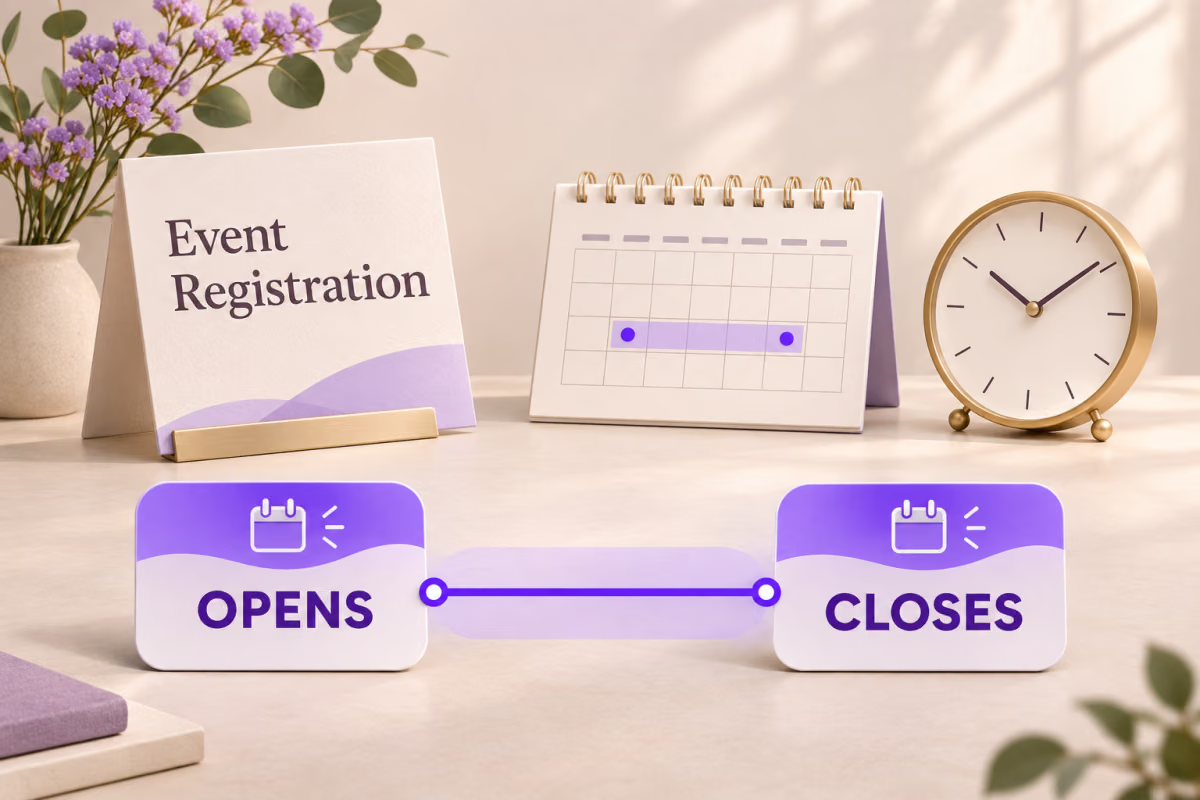
To schedule an event QR code, create a dynamic link to your registration page, set its start and end date-time, then save the QR. In QRLynx, the same printed code opens the destination during that window and shows a branded unavailable page outside it.
QRLynx QR Scheduling is included with the paid Pro, Business and Enterprise plans. The generator at the top of that feature page lets you prepare the link and dates together. This tutorial uses an event-registration example and real screenshots of the current controls.
Plan the registration window first
Decide when registration should open and close, which may be different from the event itself. Have a working registration page ready before creating its QR code. Set the form or registration platform to accept submissions during the intended period too.
| Example setting | Value | Visitor result |
|---|---|---|
| Destination | https://example.com/event-registration | Your own registration page replaces this placeholder |
| Start | December 1, 2026 at 09:00 | Before this time, the QR is unavailable |
| End | December 3, 2026 at 18:00 | After this time, the QR is unavailable again |
| Between the boundaries | One continuous window | The QR opens the registration page, subject to its other active controls |
These dates and the example.com address are illustrative. The screenshots show an unsaved configuration, not a real event or a completed registration. Replace the URL and both dates before saving your own QR.
Schedule your event QR in QRLynx
Open the generator and enter the registration URL
Sign in to a QRLynx Pro, Business or Enterprise account. Open the QR Scheduling feature page, choose Website / Link and enter your working HTTPS registration address in Campaign destination. Confirm Dynamic URL is enabled. You can also edit an existing saved dynamic QR from your account.
Open Scheduling
In QR Code Features, select Scheduling. Read the local timezone shown at the top of the QR Scheduling dialog. If it differs from the event timezone, convert the event times to the displayed timezone before entering them.
Set the opening time
Enable Start Date & Time and enter the opening date and time in Activate At. For this example, use December 1, 2026 at 09:00 in the displayed timezone. Leave the start control off only if the QR should be available immediately.
Set the closing time
Enable End Date & Time and enter December 3, 2026 at 18:00 in Deactivate At for this example. The end must be later than the start. Leave the end control off only if you want no scheduled cutoff.
Save the schedule, then save the QR
Click Save Schedule to apply the modal settings. Then click Save on the generator. For a new QR, enter a clear name such as Event registration window in the Save QR Code dialog, choose a folder if useful and click its final Save button. Wait for save success before leaving.
Reopen and verify the saved dates
Open the saved QR from your account and check the destination and Scheduling fields again. The account Scheduling page also lists the start, end and Scheduled, Active or Ended status. Download the saved dynamic QR after checking the settings.
Test the QR before distributing it
Use fresh scans to check the unavailable state before opening, the destination during the window and the unavailable state after closing. Test a printed proof at the intended size. Add a readable registration deadline and timezone beside the code.
Read the timezone beside the dates
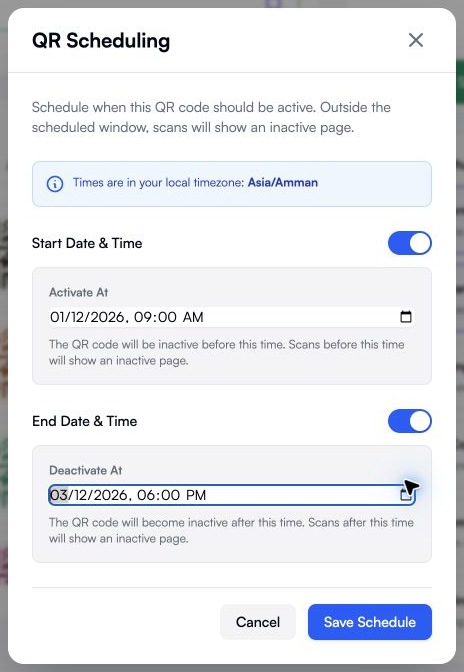
QRLynx accepts the local date-time shown by your browser and stores it as a UTC instant. In this screenshot, the displayed zone is Asia/Amman, which is UTC+3 for the example dates. December 1 at 09:00 therefore means December 1 at 06:00 UTC; December 3 at 18:00 means December 3 at 15:00 UTC.
Everyone reaches the same opening and closing instants wherever they scan. The window does not restart at 09:00 in each visitor’s timezone. A teammate viewing the saved dates from another timezone may see different clock values for the same instants.
For an event in a zone that changes clocks, check the offset for each actual event date. Avoid an ambiguous clock-change hour when possible and verify the reopened values. The Scheduling control has no separate event-timezone picker.
Finish the QR save
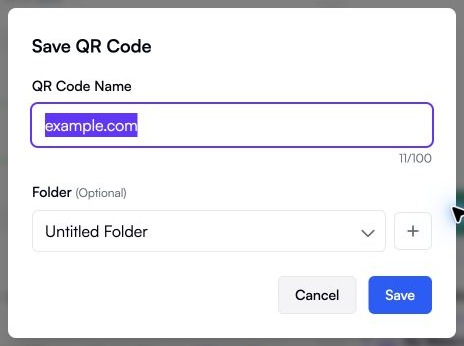
Closing the Scheduling dialog with Save Schedule is only one part of the workflow. Save the QR itself, then reopen it to confirm the destination and both boundaries were retained. If you only download an unsaved preview, you have not verified a saved scheduled QR.
Test before, during and after the window
Use a separate test QR with the same settings and a short window a few minutes ahead. That lets you observe the transitions before the real registration launch. Keep the actual event QR on its intended dates.
| Test | Expected result | What to check |
|---|---|---|
| Fresh scan before the start | QR Code Unavailable page | The registration page does not open through the QR |
| Fresh scan after the start, before the end | Registration destination | The correct event and a usable form appear |
| Fresh scan after the end | QR Code Unavailable page | The QR no longer forwards to registration |
| Open the registration URL directly | Whatever the registration platform allows | Its own deadline is enforced separately |
Record the time and result of each check. Use a new scan or reopen the QR’s own short link. Refreshing an already-open registration page does not repeat the QR scheduling check. Changing a phone’s clock does not change the server’s current time.
The table is a test procedure, not a claim that the future example window has already run. After the short-window check, verify the real saved QR’s dates and test its printed image under the lighting and distance where visitors will use it.
Choose what should happen after registration closes
QRLynx QR Scheduling shows the branded unavailable page outside the saved window. It does not provide a custom countdown, a waitlist page or an automatic alternate URL in this control.
If late visitors should still reach event information, keeping the QR available and closing registration on the destination page may be a better fit. Put the deadline and a useful next action on that page. Scheduling the QR alone cannot prevent someone who already has the destination address from opening it directly.
For a different destination at recurring daily hours, use the time-of-day QR redirect tutorial. That uses Redirect Rules, whose Time fields use UTC. This tutorial’s Scheduling dialog instead accepts local dates and times for one continuous availability window.
Update the window without reprinting
Edit the same saved dynamic QR to extend, shorten or remove the window. Turn off Start Date & Time, End Date & Time, or both as needed, then save the schedule and the QR again. Recheck the saved values and make a fresh scan.
If the QR stays unavailable during the intended window, check its active state and any other access controls or expiry rules. A valid schedule does not override those restrictions. Also check the registration URL directly so a destination error is not mistaken for a scheduling problem.
An event-registration link is separate from an attendee ticket or a calendar invitation. QRLynx scheduling does not validate ticket ownership, prevent duplicate entry or add an event to a calendar. See QR codes for events to choose the right system for each event task.
Prepare your event registration QR
Set one opening and closing window, save the dynamic QR and check the visitor experience before printing.
Event QR scheduling questions
Can I set only an opening time or only a closing time?
Yes. QRLynx lets you enable either boundary independently. A start-only schedule opens at the chosen instant with no scheduled end. An end-only schedule has no scheduled delay before opening, while other QR controls still apply.
Which timezone does the QRLynx scheduling editor use?
The dialog uses the timezone reported by your browser and shows its name above the fields. QRLynx stores the entered dates as UTC instants. Every scanner follows the same window, not a separate window in their local timezone.
What does someone see before or after the scheduled window?
They see the branded QR Code Unavailable page instead of the destination. The Scheduling control does not offer a custom countdown or an alternate expired-event destination.
Can I add this schedule to a static QR that is already printed?
No. A static QR containing the registration URL goes directly to that address and cannot gain QRLynx scheduling after printing. You can control registration on the destination page, or create and print a saved dynamic QR for scheduled access.
Does the QR schedule close the registration form itself?
No. It controls access through the QRLynx QR link. Someone with the direct form URL may still reach it. Configure the registration platform’s own deadline when submissions must close everywhere.
Can I reopen the same QR for a later registration period?
Yes. Edit the existing saved dynamic QR, change or remove its boundaries and save again. The printed pattern stays the same. Check other active controls and the destination before announcing that registration has reopened.
Will this repeat every day or every week?
No. QR Scheduling defines one absolute date-time window. For different destinations at recurring daily hours, use Redirect Rules and review the time-of-day tutorial. A daily redirect rule is a different control from this availability window.
Does scheduling turn a registration QR into an event ticket?
No. A shared registration link does not prove a person owns a ticket or record an accepted entry. Use the ticketing platform’s unique ticket codes and validation workflow for controlled admission.
Which plan and QR type does this tutorial require?
Use an eligible saved dynamic Website / Link QR with a paid QRLynx Pro, Business or Enterprise plan. GS1 Digital Link QR codes do not support ordinary QR Scheduling.